MotionBuilder 2025 review: the addition of Pixar's USD is a game-changer By Paul Hatton published 10 May 24 magcontent What's new in the leading game art animation software?
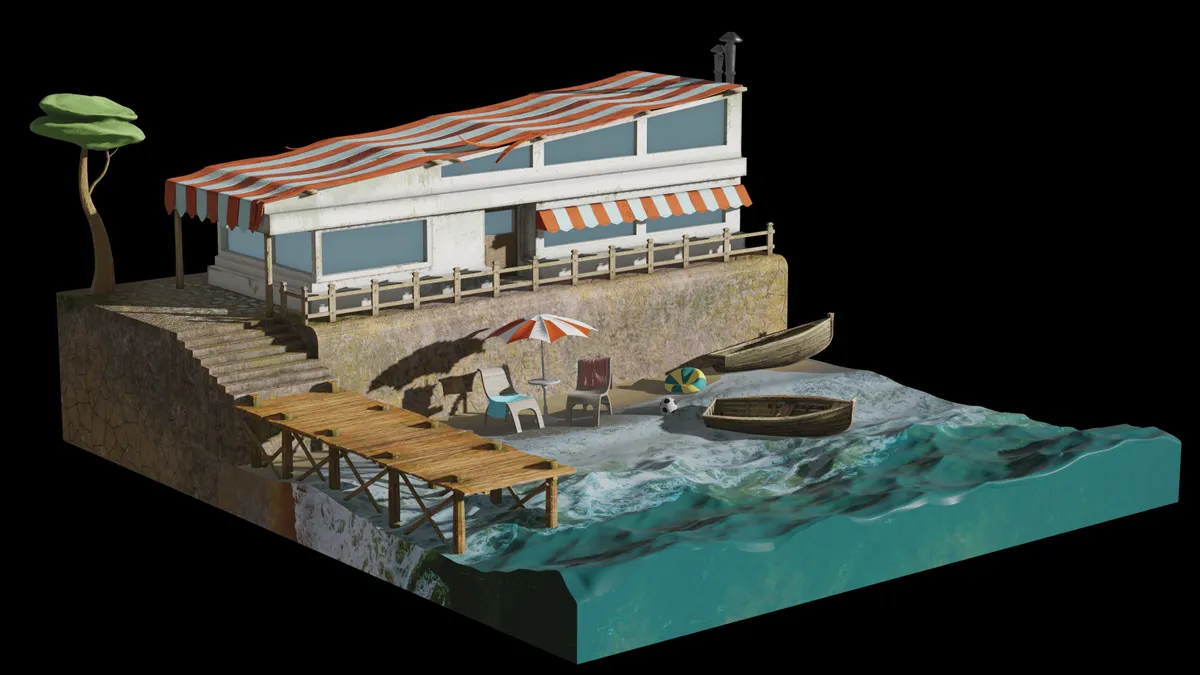
How to use Blender to build a tranquil ocean setting By Paul Hatton published 7 May 24 3D Paul Hatton loads up Blender Ocean to show you how to create a peaceful beach scene.
MoonRay review: DreamWorks Animations' superb rendering software is free for all By Paul Hatton published 6 May 24 3D The 3D tools behind Kung Fu Panda 4 can now be yours.
Uncovering the secrets behind Monarch: Legacy of Monsters By Trevor Hogg published 4 May 24 magcontent Executive producer Matt Shakman and cinematographer Jess Hall discuss balancing the drama and spectacle.
Maya 2025 review: lacks innovation but a solid update By Paul Hatton published 3 May 24 3D Does this year's animation, modelling, simulation and rendering toolset impress?
3ds Max 2025 review: a solid update but don't expect new tools By Paul Hatton published 2 May 24 3D Workflow and speed improvements dominate.
How to use Blender (and ChatGPT) to level up your video game assets By Mihai Dobrin published 1 May 24 Tutorial Upgrading the assets for hit video game Total War: Pharaoh
How to sculpt a reptilian creature using ZBrush, Maya and Substance 3D By Richard Jusuf published 29 April 24 Tutorial Use a mix of software to craft a production-ready character.
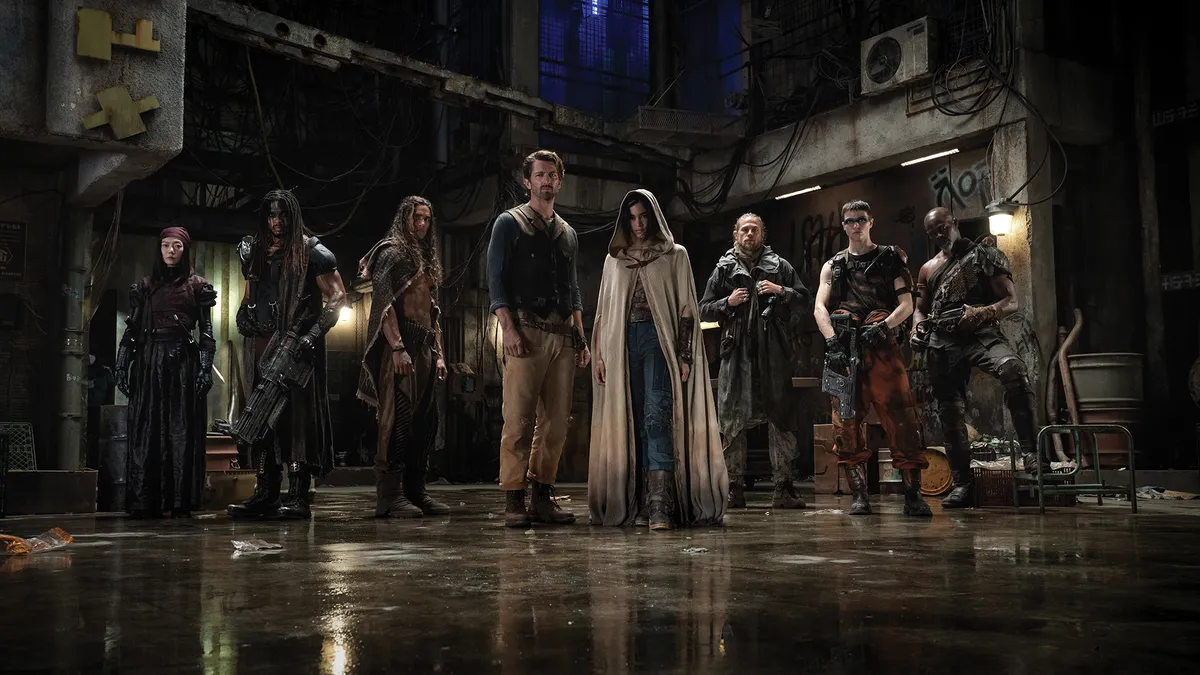
Uncovering the secrets behind Rebel Moon: Part One – A Child of Fire By Trevor Hogg published 27 April 24 magcontent Production designers Stephen Swain and Stefan Dechant discuss bringing Zack Synder's world to life.
The best Unity plugins: we review the latest tools for game creators By Paul Hatton published 26 April 24 game development Increase the quality of your games while saving time in the process.
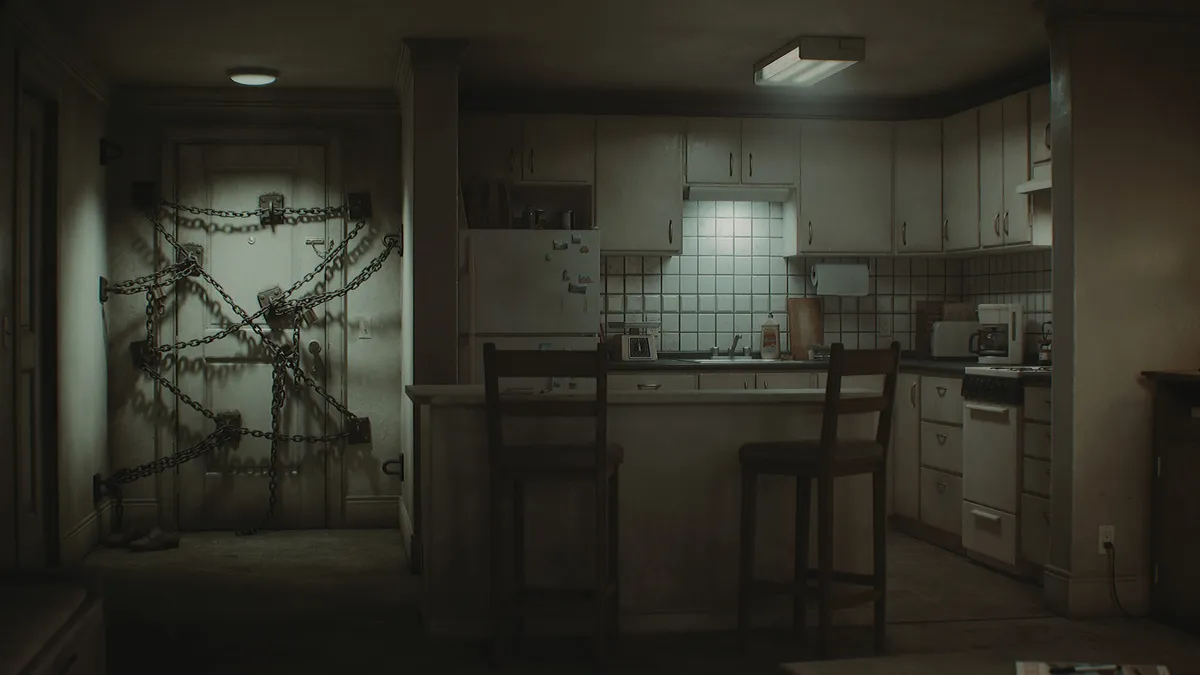
How to create realistic game interiors in Unreal Engine 5 By Maxim Dorokhov published 26 April 24 Digital Art Maxim Dorokhov shows how to make realistic gaming interiors in Unreal Engine 5, using the apartment from Silent Hill 4.
LightWave 2023 review: 3D software makes strong return By Paul Hatton published 23 April 24 3D LightWave is back in the game thanks to a raft of new features, including an Unreal Engine bridge.
"Animation and art runs through us all": Inside the world of Bomper studio By 3D World staff published 14 April 24 magcontent Catching up with Emlyn Davies and Mark Procter of Wales-based animation studio Bomper on its 10th anniversary.
Inside the art of Annibale Siconolfi By Paul Hatton published 7 April 24 magcontent The Italian artist’s architectural background, the design philosophies behind his work, and why he’s a supporter of NFTs.
A day in the life: Senior animation supervisor Liz Bernard By 3D World staff published 6 April 24 magcontent Explore a not-so-average day in the life of the Digital Domain animation mastermind.
Creating a whole world with Jellyfish Pictures By James Clarke published 24 March 24 magcontent New creative director Archie Donato discusses the VFX and animation studio’s philosophy, leading a team, and the joy of creativity.
Boulies NUBI Series review: compact but comfortable and stylish chair By Cesci Angell published 24 March 24 office chairs It's snug, comfortable and highly adjustable - what's not to like about the Boulies NUBI Series?
Wacom One 13 Touch review: impressive features elevate entry-level pen display tablet By Cesci Angell published 22 March 24 Drawing Tablets Wacom ticks nearly every box for budding artists with the One 13 Touch.
How to render on the iPad using CLEO By Glen Southern published 17 March 24 magcontent A guide to both real-time and full ray-tracing from the convenience of your tablet.
The best laptops for 3D modelling By Erlingur Einarsson last updated 7 March 24 Hardware Find the best machines for 3D modelling and rendering.